Introduction
Classic fuzz circuits, such as the one found in the original Fuzz Face pedal, created a unique style of asymmetric clipping which gave them their signature fuzzy feel. In this post we’ll be looking at the circuit feature which caused their hard clipped output waveforms to be asymmetric and how the Vector Drive can be used to recreate classic fuzz tones. We also demonstrate some sample audio and show how these features really sound.
We’d like to give a shout out to the excellent analysis of the Fuzz Face done by Electro Smash. Their articles were invaluable while designing the Vector Drive.
Fuzz Face Analysis
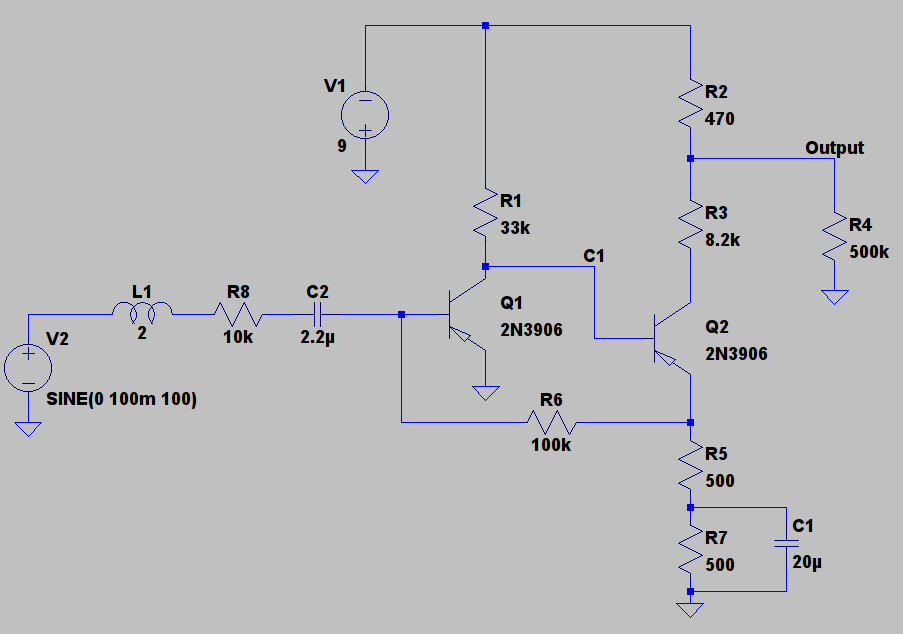
For this section we built the Fuzz Face circuit in LTSpice, a free (no cost, closed source) circuit simulation package from Linear Technology. The original Fuzz Face used the AC128 germanium PNP transistor, a device which doesn’t have a manufacture-published SPICE model (unless you trust random forum posts). As such we substituted The AC128 with a modern 2N3906 silicon PNP transistor. The results won’t exactly match the real circuit (the AC128s were highly variable anyway) but we aren’t trying to copy the Fuzz Face, just observe its general clipping style.
You can find our LTSpice circuit here. Note that it includes a 2H inductor and 10k Ohm resistor modelling the source impedance of a guitar pickup. These are typical values, if you can find data on your own pickup they can be adjusted to your needs. Note that active pickups, such as the classic EMG81, will have a purely resistive output impedance requiring the removal of L1.
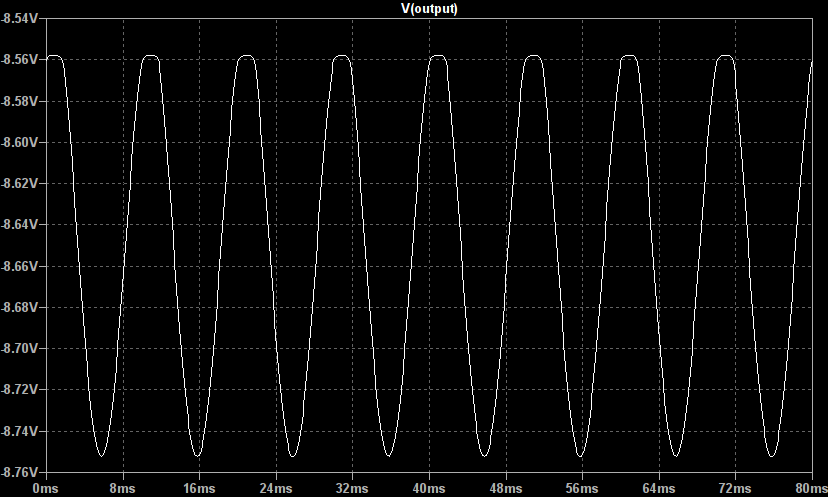
The characteristic we’re interested in here is the shape of the output waveform at low and high input levels. Driven with a 1mV sine wave the output below shows a little clipping and is amplified to around 200mV p-p:
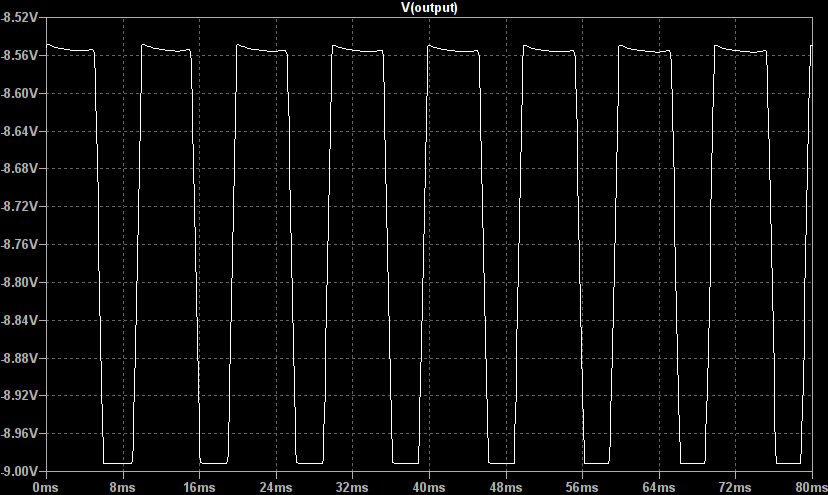
However, when driven with a larger 100mV signal the output shows obvious hard clipping and is strongly asymmetric, spending much of its time clipped high with only short bursts clipped low:
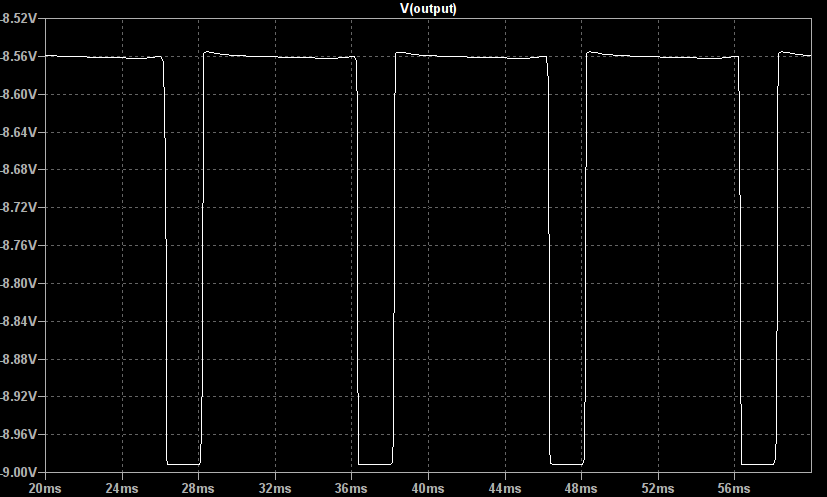
NB: The above plot was made with the pickup source impedance removed.
The source of this asymmetry is the way the input signal is coupled into the base of Q1, the first transistor. When driven with a 100mV sine wave the voltage at this point is only below the ~600mV base conduction threshold for a small amount of time at the bottom of each cycle:
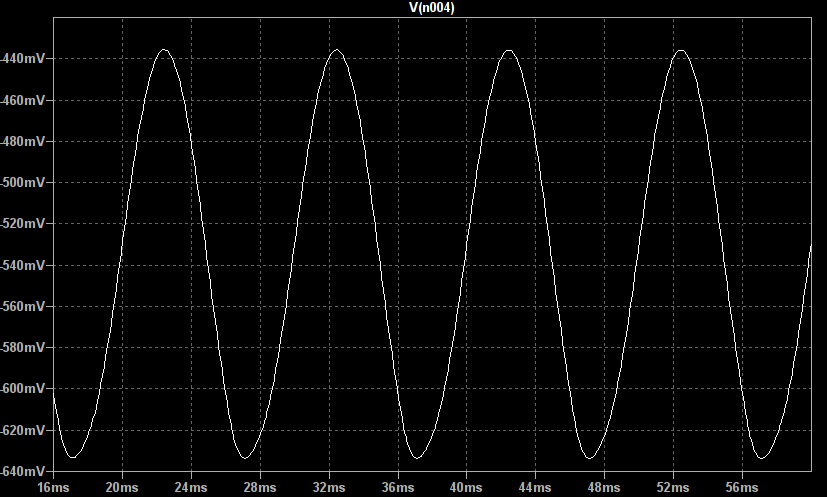
It is crucial to note that here we are driving the Fuzz Face’s input with a low impedance source such as another guitar pedal. With the typical pickup model (10k resistor and 2H inductor) placed in series with the signal source the output becomes markedly more symmetric but still spends more time clipped high than low:
It is control over this hard clipped asymmetry (the non-50%-duty cycle) which we implemented in the Vector drive.
Vector Drive Implementation
Before talking about the asymmetry implementation we will look at the Vector Drive’s distortion signal chain. The input signal is fed through a high pass filter to remove any DC offsets (and, if desired, bass frequencies) then into a static non-linearity. The static non-linearity is the equation which dictates the signal clipping shape.
In the Vector Drive the static non-linearity is the equation:
(1) 
which, when plotted, looks like this:
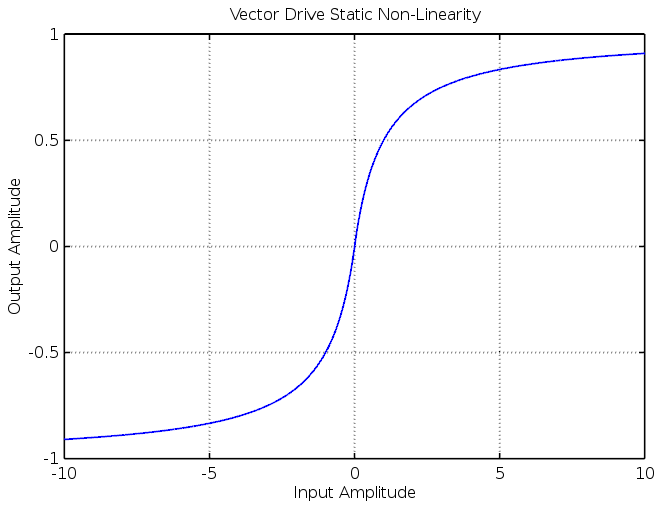 This saturation function is reasonably soft but perfectly capable of producing hard clipped, high gain waveforms as well.
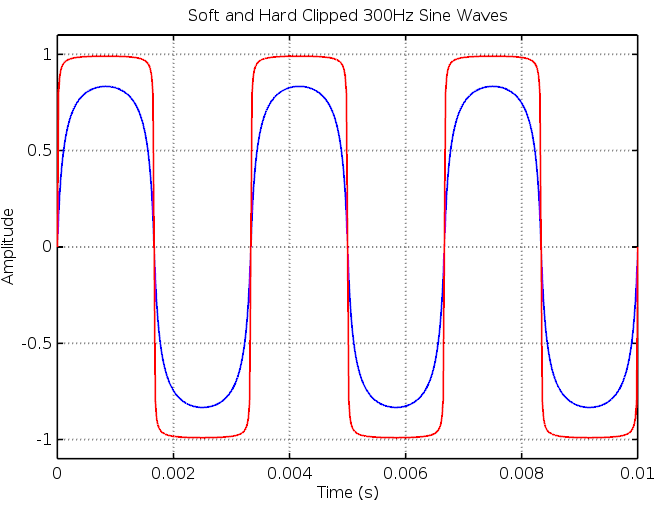
The Fuzz Face’s asymmetry can be produced by adding a vertical offset to the input signal prior to feeding it through the static non-linearity function. There are, however, complications. The result of adding a constant offset of 8 to input sine waves of amplitudes 1 (blue), 10 (green) and 100 (red) is shown below:
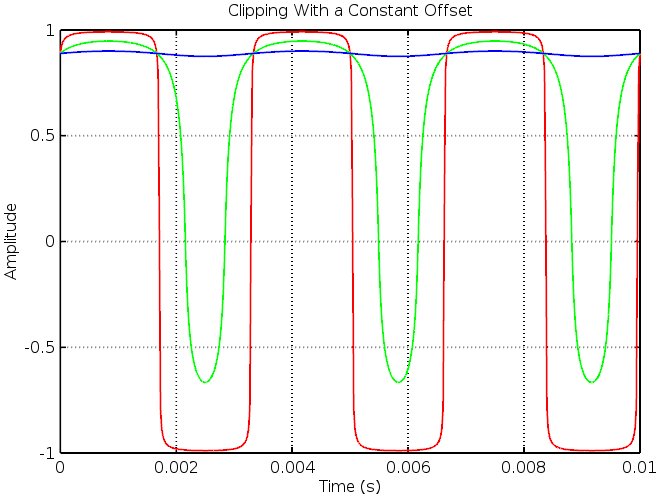
The green waveform is as expected, it shows strongly asymmetric soft clipping. However, the effect is lost on the high amplitude sine wave and the low amplitude input has been strongly attenuated. This offsetting method sounds markedly unpleasant as strong signals suddenly jump out and the ability to sustain notes is lost, as audible in the following sound clips:
NB: All the sound clips below have been passed through the Vector Drive’s cabinet modelling filter. No external amplifier has been used. The Vector Drive’s input high pass filter cutoff was set to 100Hz.
Clean recording:
Constant offset clipping:
The solution to the problem above is to measure the input’s amplitude with an envelope follower and add an offset which is proportional to this value. Adding an 80% amplitude offset to the three sine waves above produces this result:
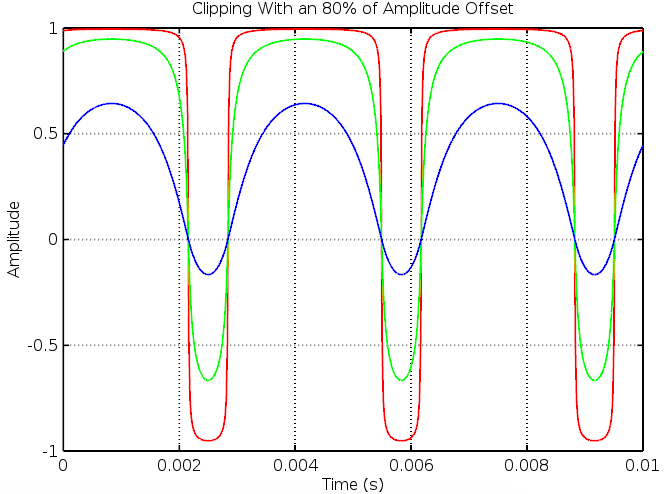
The asymmetry is very similar between the three waveforms and the low amplitude input is only about 6dB below the hard clipped high gain waveform (ie: this method compresses dynamic range in a way we expect a distortion circuit should). The DC offset present in the above waveforms is easily removed with a low frequency (~20Hz) high pass filter.
When this method is applied to the sample riff above it produces a far more musical result. The following samples start with zero offset (just plain distortion saturation) and become “fuzzier” in each clip thereafter:
The Vector Drive allows the offset to be smoothly varied from purely symmetric distortion to super crackly “ripped speaker cone” fuzz. This parameter can be adjusted independently of the other major settings such as the input high pass filter, amplitude symmetry waveshaper and 3ch EQ allow full control of your custom tone creation.